Friday, March 25, 2011
PC Case Made With A Taig Mill
Wednesday, March 9, 2011
Peter Zicha’s Taig Twins
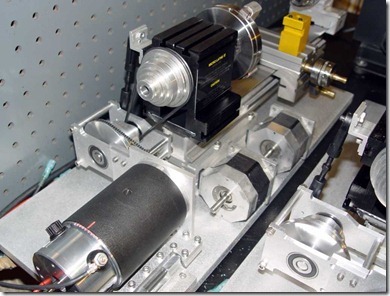
“Here is were I am at with the Taig twins , as I mentioned one will be CNC and the other manual / electric. both units will ultimately be mounted side by side.”
Tuesday, March 8, 2011
Monty Remon’s Adjustable Height Toolpost
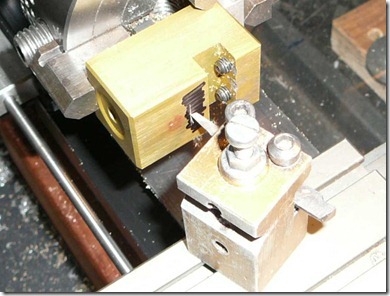
“Once I had seen a design for an adjustable height tool post I new I'd have to make one, the woodruff key design was ideal. I have reconstructed here with photos the operations I used to achieve my goal, hope it helps someone.
I used 1"x1/4" steel off cuts clamped in the tool post, this was used as the work holder and then this was mounted off centre in the 4J chuck. A radius of 0.75" was suitable for machining material 1/4" thick, (a piece of 1/4" brass has been substituted for illustration purposes.)
Method, cutting the external diam.. First, wind out the tool .75" from the centre, zero dial (note reading). Centre the tool post width in the 4J then offset with the other jaws and packing to bring the work piece up to the tool bit. Now crank away from the work, and check everything is clamped tight. 3/8" of cutting will allow enough metal to part off with a saw later. I took 5 thou cuts and was down to the surface ( ZERO/.75" rad.,) in no time. Change your tool bit now for a thin internal cutting one and wind it OUT until the cutting edge aligns with the external surface you have just machined. Slide the tool holder out of the chuck. Remove the woodruff piece and the 2 tool post screws. Mark a line on the face of the tool post 1/4" below the normal tool bit seating. Slip the tool post back in the 4J and wind the jaws until the scribed line comes up to the cutting edge of the tool bit, clamp everything again with padding. Now do the internal boring, here the radius of the cut takes president over the depth (1/4") of the cut, the inside edge of the tool bit will catch the top of the tool post slot if you get this wrong. Set the depth stop and remove metal until you 'zero'. Theoretically both machined surfaces will have the same curvature. Saw your woodruff seating turning off the stump, you could now clamp this back in the tool post and face the edge. This has been harder to describe than to make!”
Monday, March 7, 2011
Monty Remon’s Diamond Tool Holder
An internet search for diamond tool holders reveals that this method of grinding and mounting tool bits has been around for years and that several designs are manufactured for the industry and retail at considerable (inhibiting) sums.
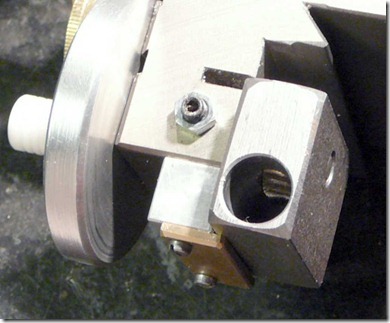
I like many must have puzzled over the geometry and the tool holder machining to get the magic angles at the sharp end. I was lucky my solution came in a flash and I made the prototype in five minutes. I just worked back from the bit in a straight line (keep it simple), the tool holder was a piece of 5/16 square door handle furniture mounted in a Taig tool post, jacked up 3/32" then the end drilled through 1/8" diam., at 10degs 'ish and then a saw cut 1/3 down and long enough to get a far as the clamping bolts. It took a further 15 minutes to try and grind a tool bit. My non-standard Taig tool post was reduced in height by 1/4" to allow for the tool bit geometry and a 1/4" packing washer fitted to the top to keep the clamping bolt happy and the large corner reliefs allow the tool access to the work piece. The theory that the vertical clamping force would lock the inclined tool bit proved true.
OK so that was the tangential system sorted but the 'diamond' part needed internet help from those in the know. I found figures of 30 degs tool bit grinding angle and mounting in two planes at 12/12degs., to be common. Much head scratching and drawing yielded the result that the tool bit should be inclined at 16 degs., in the tool holder to give the req'd angles with the holder/ tool post clamped at 45 degs to the work face. (Could it be this simple?)
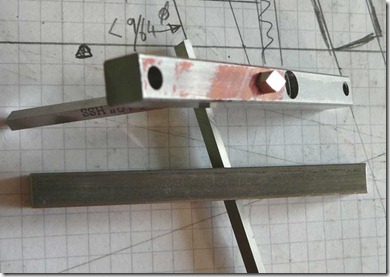
I came up with a system to accurately drill and broach 1/8" square hole in a tool holder at the 16 degs., and achieve a 30 deg., face on the tool bit. Basically two tool holders are made at the same time, with part of each forming the drilling broaching /guide for the other.
The broaching tool was a length of 1/8 sq., tool steel set in a flanged brass turning, the drill chuck transmits the cutting force via the flange to the broaching bit. A diamond disc in a Dremel was used to make notches on the end of the cutter.
The 5/16 bars were bolted together and packed up 3/4" one end then clamped to the side of a 1x2x3 block for drilling and broaching. Flipped over and the process repeated. The parts were unbolted and the small clamping bolt holes drilled and tapped, then separated with a saw and slotted. Grinding the angle on the end and fitting the clamping bolt and washer completes the tool holder.
Bit sharpening the correct angle is achieved by using the tool holder. If 7/8" diam wheels are fitted as per the drawing and a roughly ground (30 degs.,) piece of 1/8x1/8 tool steel is clamped with 1/16" protruding from the bottom, then rolling the assy., to and fro on a diamond stone will give the correct angle.
A couple of points. Flatting the surfaces of the bars with a fine file prior to bolting together and broaching would seem advisable and and it would help with stability in the tool post, but you could of course start with thicker stock and mill it down but it would seem that 5/16" bar fills the bill.
If the axel hole is omitted from one of the parts then the slot could be extended to the mid clamping point and the inboard tool post bolt used to clamp the bit as in my prototype effort.
How well does it work? It performs just like in the videos. I was only surprised at how good it felt to slowly hand feed the tool and see the metal come off, what a good finish!
Sunday, March 6, 2011
Monty Remon’s Power Feed Leadscrew Mod
I rarely use the drilling tail stock with the cross slide in place, so it's a case of swapping one component for the other. Anyone with the new power feed lathe will be aware of the problems of sliding the carriage back on the bed with the lead screw flailing about. For those that don't the lead screw is driven by the g/box via a spring and it is really floppy, its end locates in a pivoting block on the carriage assy., trying to line up these components several times per job is a pain. My solution to the problem was to limit the angular movement of the block to a few degrees by bolting a plate and a bit of 1/2x1/2 to the bottom of the carriage. I turned a bullet shaped guide out of brass to fit the end of the lead screw. How do you machine the end of 12 inches of 1/2" diam., lead screw in a Taig lathe? It will not go through the spindle and it is too long to mount in the chuck. I attacked the problem from a different direction. The drilling tail stock just happens to be great for clamping 1/2" lead screws if you remove the ram and lever first. A mill was colleted (?) and drill and tap was chucked in the head stock end and the work fed into these by sliding the tail stock in by hand. With the guide fitted the assy., was reconnected to the gear box and now the carriage can be slid onto the bed and the lead screw located blind with the minimum of fumbling. The other problem with the spring coupling is the lack of control with about 3/16" of axial play in the lead screw it feels like you are machining rubber! The way I tightened things up was to put a groove in the brass guide fitted on the end of the lead screw and make a sliding bolt assy., to engage in this to restrict axial movement. The whole thing clamps in the dovetails on the back of the bed in the same manner as the g/box mounting. It now feels as responsive as the older rack and pinion system.
Saturday, March 5, 2011
Monty Remon’s Engine and Misc. Projects
Another little problem I finally got round to sorting is the end of the milling slide l/screw marking the top edge of the cross slide when located in the fore/aft position. I fitted a limit stop in the form of a grub screw and lock nut to a redundant corner of the l/screw mounting plate and set it to give a few thou., clearance on the l/screw. The observant amongst you will have noticed the resemblance of the slide to a Swiss cheese, the extra holes help to mount the slide at 45 degs on the cross slide.
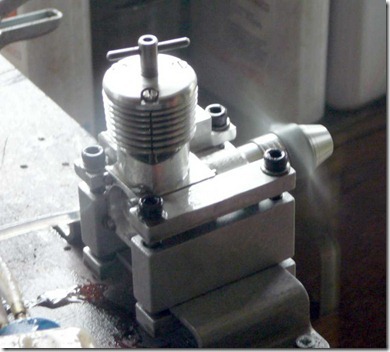
I guess you might wonder what I do with my lathe rather than what I do to it, so I'll include a few photos of what I am really interested in. I like to modify/tune/repair model diesel engines, I selected P.A.W. engines because they are cheap and cheerful, if a bit agricultural. One pic is of a PAW 2.49 contest diesel going through my hands at the moment, the only parts not replaced or tweaked are the gudgeon pin and the prop., nut. I have developed two new induction systems (both work well), two new carb's., one is a straight swap with the PAW venturi but works like a COX peripheral, the other one is adjustable, annular jet, made to fit my Oliver Tiger but suitable for any thing that sucks. I also have an automatic variable venturi system not yet running. As for cooling, I have just got on top of cylinder heads (groan), well I was going to say I had cylinder jackets all wrapped up (you want more?). Porting and transfer passages is the latest avenue (!) I am exploring, my mock-up cylinders are made out of acrylic tube as it helps to understand work/tool alignment and where the cutters are going and how much material is left, but I'm sorry to say I can't show any pics of the porting as the results would be clearly seen (is that one groan or two?). A few pics of my first bar stock engine with a new induction system running on the test bench, far better than I expected for a new concept, still room for tweaking things though. A pic of some bar stock components ready for induction experiments, I have been getting my moneys worth out of the milling slide.
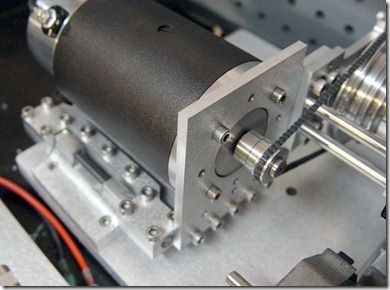
The next stuff I will be sending is in progress, I'm going DC. I've tacked all the boxes together to test it. So I've just made a slightly larger pulley extension that includes a drum 60 div., facility, machined in the same manner as my chuck mod., but now I realize I've lost a facility I used a lot with my old disc type system, I could use clamps on the perimeter and stops on the headstock so that I was able to mill arcs with a degree of precision- so today it will be another disc system. Last night I found out that 5.5mm hex bar locates and slides smoothly in the 'T' slots, so using the side slot and a top slot on the new head stock there is a .25" radius diff., room for 60+72 div., holes and a clamping zone on a 3.75" disc, I can feel it is all going to come together nicely.
Friday, March 4, 2011
Steve Fornelius’ Headstock Dial Indicator Holder
Here's another idea I put to use, a Headstock Dial Indicator Holder. We all need a way to hold a dial indicator so that we can align workpieces in the independent jaw chucks. I tried putting a steel plate on the headstock with double faced tape, and while that worked, I still needed to take off the whole thing before I machined. I decided to make a simple fixture that would hold the shaft of the dial indicator, but would be able to swing out of the way once the measurements were done. I came up with this idea: Turn a cylinder from steel that fit the hole in the dial indicator clamp. I made mine about 1.5 inches high. Then turn and thread one end 10-32 so that the square nut will thread on it. Make the threaded end about 3/8" long. Thread on a nut and slide it into the slot on the headstock. Tighten gently, and file off the end of the threads so that the base sits flat on the headstock when tightened into the nut, but when loosened, the base slides easily. This allows for about 3 inches of front-to-back movement, and the length of the commercial dial indicator shaft (with adjuster) lets me go out about 5 inches on a shaft to check for runout.

